Quick reference for the PSoC6™
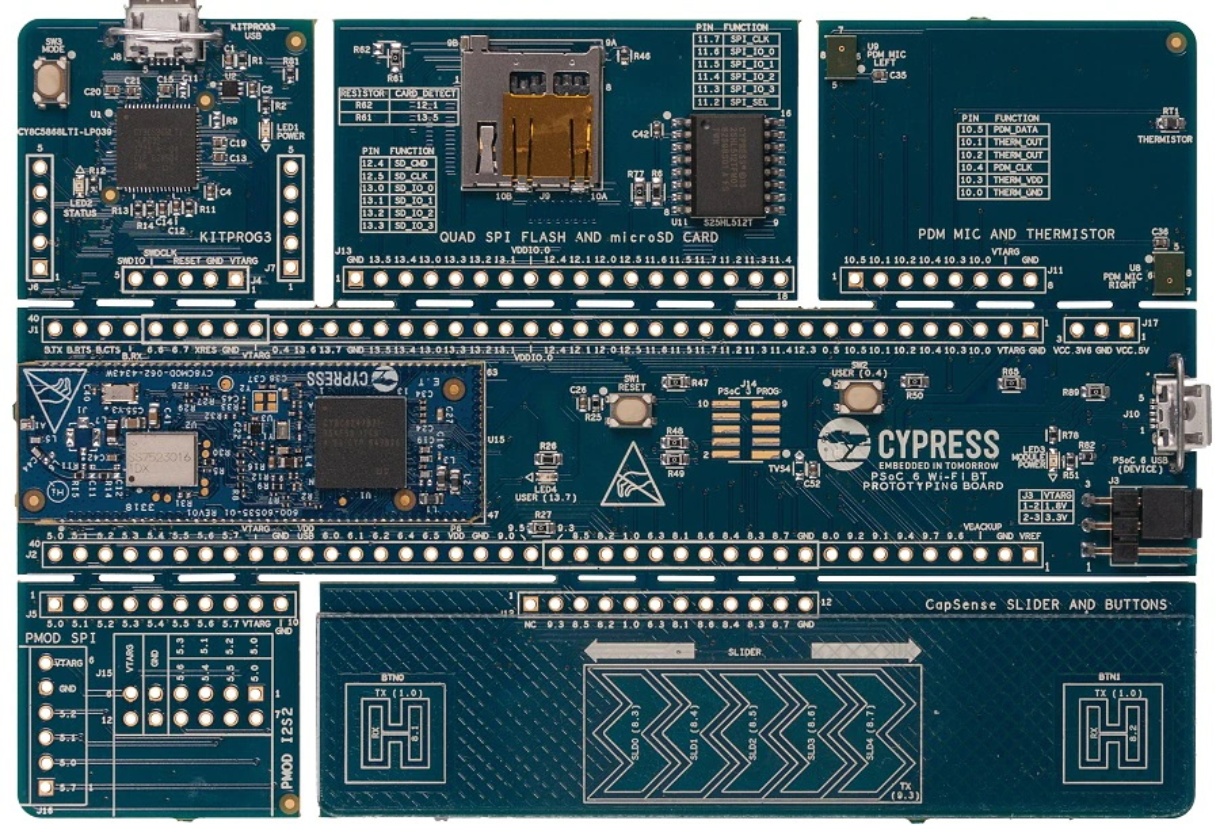
The CY8CPROTO-062-4343W PSoC6™ Board.
Below is a quick reference for PSoC6™ boards. If it is your first time working with this port it may be useful to get an overview of the microcontroller:
Warning
The PSoC6™ port is still in an early stage of development. It is expected any MicroPython built-in library to be supported, but not all libraries, modules and features have been yet evaluated. For those modules relying on platform and hardware dependencies, only the listed and documented in this quick reference are certainyly supported.
Please, consider opening an issue or discussion on GitHub for any clarification required on available features or requests for missing ones.
General board control
The MicroPython REPL is accessed via the USB serial port. Paste mode (ctrl-E) is useful to paste a large slab of Python code into the REPL.
This port implements most of the methods described in the machine module. Tab-completion is useful to
find out what methods an instantiated object has.
The machine module:
import machine

machine.freq()          # get the current frequency of the CPU
Delay and timing
Use the time module:
import time

time.sleep(1)           # sleep for 1 second
time.sleep_ms(500)      # sleep for 500 milliseconds
time.sleep_us(10)       # sleep for 10 microseconds
start = time.ticks_ms() # get millisecond counter
delta = time.ticks_diff(time.ticks_ms(), start) # compute time difference
start = time.ticks_us() # get microsecond counter
delta = time.ticks_diff(time.ticks_us(), start) # compute time difference
Timers
Feature unavailable. Placeholder. To be completed.
Pins and GPIO
Most of the methods (functions) and constants given in the machine.Pin class have been implemented in this port. Any functions in addition to those or function calls with ambiguous list of parameters have been documented here with suitable examples.
The constructor
The constructor can be called in different flavors and configurations based on the number of arguments (parameters) passed.
An instance of the machine.Pin class can be created by invoking the constructor with all the necessary parameters to fully configure the Pin.
from machine import Pin

p0 = Pin('P13_7', Pin.OUT, Pin.PULL_DOWN, value=Pin.STATE_LOW)   # create output pin on pin P13_7,
                                                                 # with pull-down resistor enabled,
                                                                 # with initial value 0 (STATE_LOW)
Additionally, with any combination of parameters (except the Pin number or id which should be passed mandatorily), a machine.Pin object with various configuration levels can be instantiated. In these cases, the Pin.init() function has to be called proactively to set the other necessary configurations, as needed.
Moreover, a pre-configured pin object can be repurposed by calling the Pin.init() function.
from machine import Pin

p0 = Pin('P13_7')                    # create pin object for pin P13_7.
p0.init(Pin.OUT, Pin.PULL_DOWN)      # set pin as output and enable pull-down resistor.
p0.low()                             # set value low.
Similar to CPython, the parameters can be passed in any order if keywords are used. On the other hand, in case of a non-keyword assignment if a parameter is not to be set, a None is to be passed in its place.
from machine import Pin

p0 = Pin(id='P13_7', value=Pin.STATE_LOW, pull=Pin.PULL_DOWN, mode=Pin.OUT)     # create output pin on pin P13_7,
                                                                                # with pull-down resistor enabled,
                                                                                # with initial value 0 (STATE_LOW)


p1 = Pin('P0_0', Pin.OUT, None, value=Pin.STATE_HIGH)                           # create output pin on pin P0_0,
                                                                                # with pull as NONE,
                                                                                # with initial value 1 (STATE_HIGH)
Note that the parameters such as value can only be passed as keyword arguments.
Methods
- Pin.toggle()
Set pin value to its complement.
Constants
The following constants are used to configure the pin objects in addition to the ones mentioned in the machine.Pin class.
Software I2C bus
Software I2C (using bit-banging) works on all output-capable pins, and is accessed via machine.SoftI2C
from machine import Pin, SoftI2C

i2c = SoftI2C(scl='P5_0', sda='P5_1', freq=100000)

i2c.scan()              # scan for devices

i2c.readfrom(0x3a, 4)   # read 4 bytes from device with address 0x3a
i2c.writeto(0x3a, '12') # write '12' to device with address 0x3a

buf = bytearray(10)     # create a buffer with 10 bytes
i2c.writeto(0x3a, buf)  # write the given buffer to the peripheral
Hardware I2C bus
Hardware I2C works on the following listed pair of I2C pins
Default |
||
|---|---|---|
scl |
P6_0 |
P9_0 |
sda |
P6_1 |
P9_1 |
The driver is accessed via machine.I2C
The constructor
An instance of the machine.I2C class can be created by invoking the constructor with all the
necessary parameters to fully configure the I2C. By invoking the constructor, I2C peripheral is
initialized and configured to work in master mode.
from machine import I2C
i2c = I2C(0,scl='P6_0',sda='P6_1',freq=4000000)
Here, id=0 should be passed mandatorily which selects the master mode operation.
from machine import I2C
i2c = I2C(0)  #I2C is initialized & configured with default scl, sda pin & frequency
from machine import I2C
i2c = I2C(0,scl='P9_0',sda='P9_1',freq=4000000)  #I2C is initialised & configured with given scl,sda pins & frequency
Methods
All the methods(functions) given in machine.I2C class have been implemented in this port except:
- I2C.init()
All the initialization & configurations are handled by the constructor. Hence init() is not required.
Real time clock (RTC)
See machine.RTC
from machine import RTC

rtc = RTC()
rtc.init((2023, 1, 1, 0, 0, 0, 0, 0)) # initialize rtc with specific date and time,
                                      # eg. 2023/1/1 00:00:00
rtc.datetime((2017, 8, 23, 2, 12, 48, 0, 0)) # set a specific date and
                                             # time, eg. 2017/8/23 1:12:48
rtc.datetime() # get date and time
rtc.now() # get current date and time
Note
Setting a random week day in ‘wday’ field is not valid. The underlying library implements the logic to always calculate the right weekday based on the year, date and month passed. However, datetime() will not raise an error for this, but rather re-write the field with last calculated actual value.